
System restore points – What are they and how do they work?
A system restore point creates a copy of the system files on your computer. This allows you to restore your computer to its previous ‘state’ following a failed update or hardware failure. Restore points are stored locally on the drive where the operating system is installed. When configuring restore points, you should enter the relevant information carefully to avoid ‘filling up’ your hard drive and to manage restore points easily.
Configuring settings
Open System Properties:
o Click Start and type ‘System Restore’ or ‘Create a restore point’ in the search box.
o In the results, click Create a restore point.
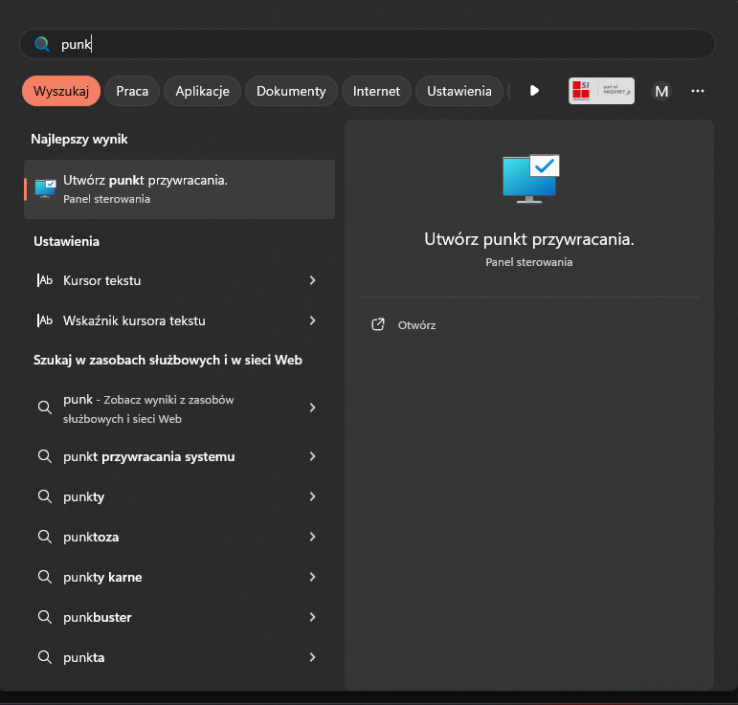
System Protection Settings:
o In the System Properties window, click the System Protection tab.
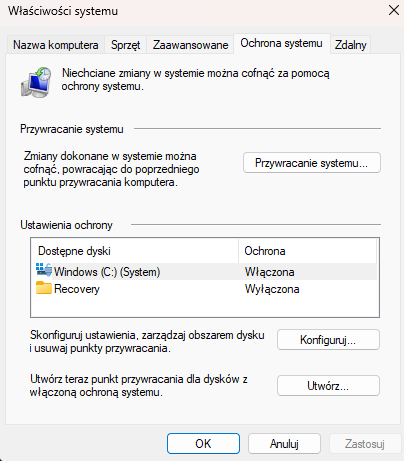
o Here you will find a list of available drives. The system usually enables protection only for the system drive (C:), but you can configure restore points for other drives.
Enabling system protection:
o Select the drive for which you wish to enable system protection and click the Configure button.
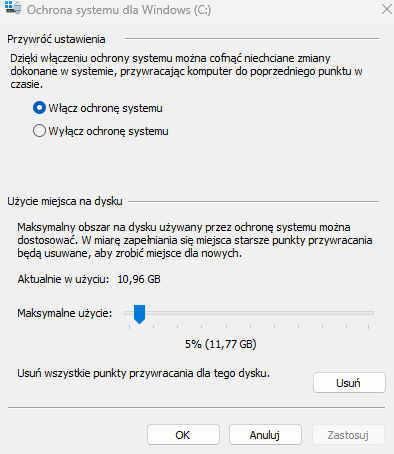
o In the Protection Settings section, select the ‘Enable system protection’ option.
Adjusting the disk space allocated to restore points:
o In the same section, you can also adjust the amount of disk space allocated to restore points. Move the slider to set your preferred storage size. It is best not to exceed 15% when setting the maximum disk usage. Once this limit is exceeded, the oldest restore points will be deleted automatically.
HOW DO I CREATE A RESTORE POINT?
Creating a restore point:
o To create a restore point, click the Create button.
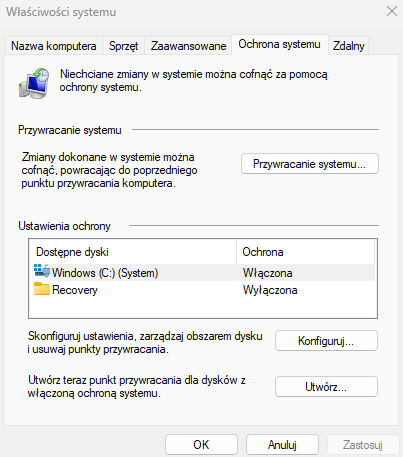
o Enter a name for the restore point.
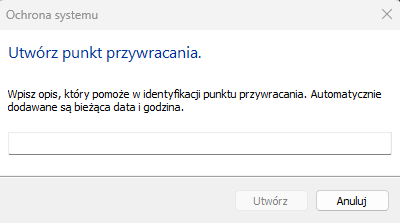
o Click Create, and the system will automatically save the current system state.
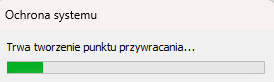
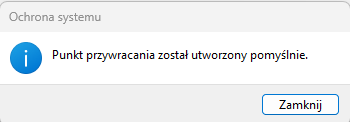
Confirmation and closure:
o Click OK to save the settings and close the configuration windows.
How do I restore the system from a restore point?
Open the System Restore tool:
o Click Start and type ‘System Restore’ into the search box.
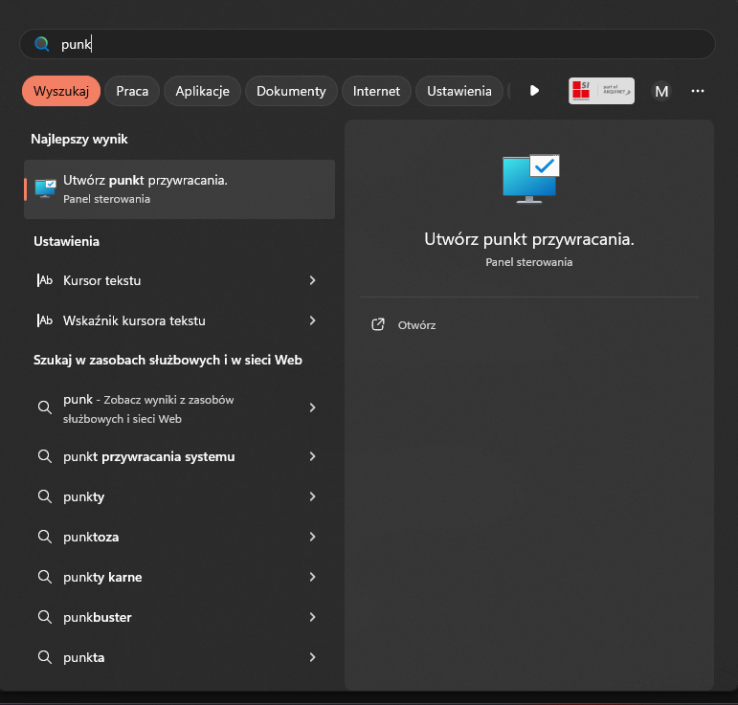
In the results, select ‘Create a restore point’, then, in the System Properties window, click the ‘System Restore’ button.
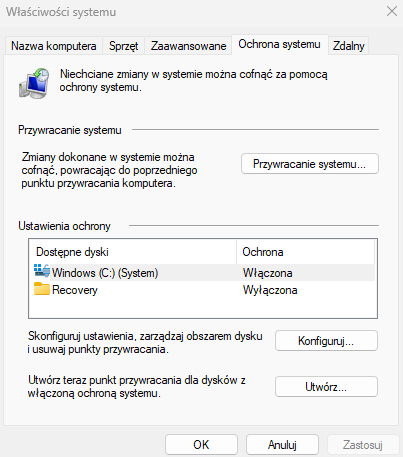
Launch the System Restore wizard:
o In the System Restore window, click Next to view the available restore points.
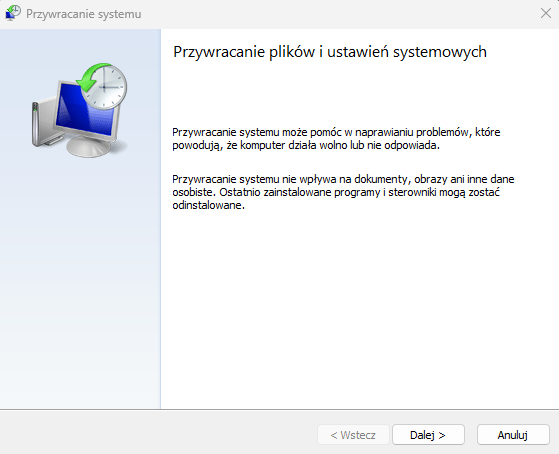
Select a restore point:
o A list of available restore points will be displayed. Select the restore point you wish to use to restore the system.
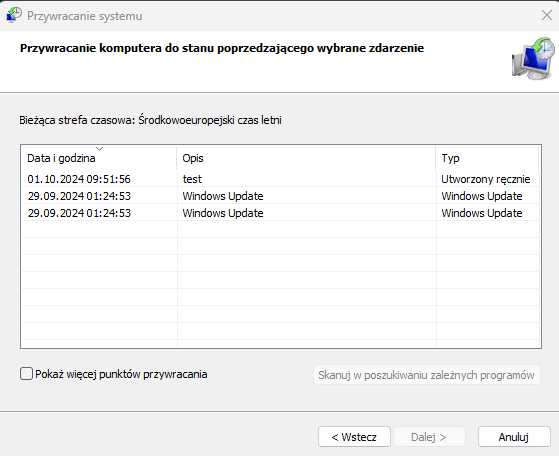
o If you want to see more restore points, tick the ‘Show more restore points’ option.
Confirm your selection:
o Once you have selected a point, click Next.
Confirm the restore:
o You will see the details of the selected point on the screen. Click Finish to start the restore process.
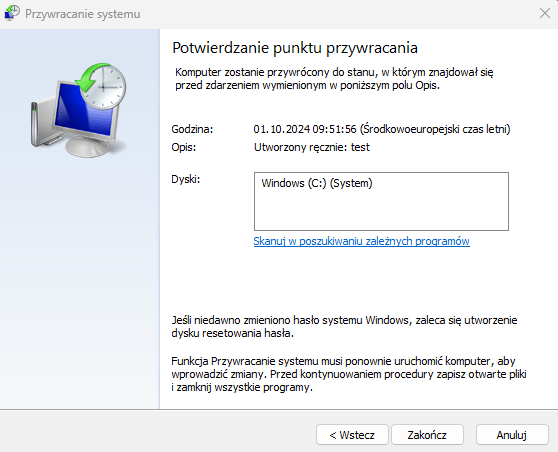
Restore process:
o Windows will restart and begin the process of restoring the system to the state saved at the selected restore point. This may take a while.
Restore
confirmation:
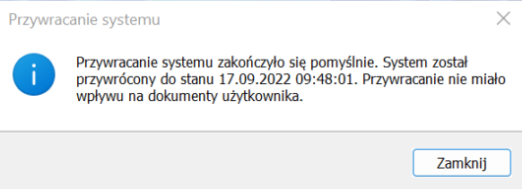
o Once the restore is complete, the system will restart. You will receive a message informing you that the system has been successfully restored to the selected restore point.
AUTHOR: Mateusz Drużga from the Support and Service Department